


Forecast: Baby Shower DIY Projects!
- By Andrew Jacobs
- Jun 10, 2016


Forecast: Baby Shower DIY Projects!
When you're expecting, the last thing you're expecting is to spend a lot of time & money on baby shower invitations. Say you plan on ordering premade cards, you'll probably be paying.. well... a lot! Using our products and things found at home, you can easily pull off a cost effective, homemade invitation. Whether you're the one throwing the shower, or the Mom-To-Be, personalized baby shower invites can be done quickly and with ease.
Here are some easy and affordable ways to create memorable invitations for your friends and family!
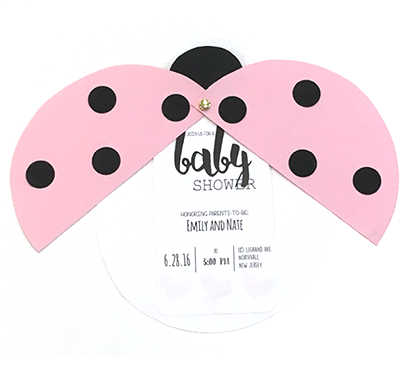
The Little Ladybug Invite
Requirements:
- 1 pack of JAM Pink Paper
- 1 pack of JAM White Paper
- 1 pack of JAM Black Paper
- 1 pack of JAM Clear Paper
- 1 JAM Hole Puncher
- Colored Printer
- 1 Corner Punch
- Scissors
- Bowl
- 1 pack of Brad's
To Break it Down...
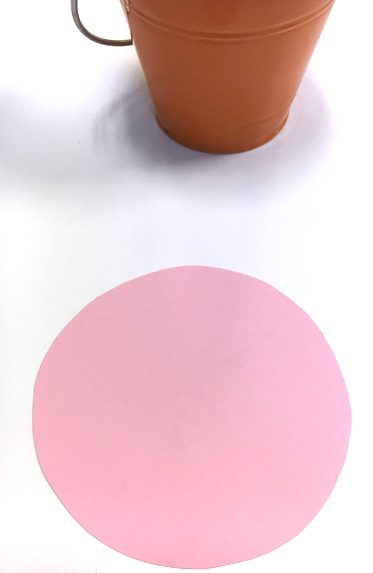
Step 1: Using pink paper and a bowl (I used a pail), trace a circle onto your piece of paper. Grab your handy pair of scissors and cut out the circle, this pink piece will work as your Ladybug's wings.
Repeat step one using white paper, this piece will work as your Ladybug's body and where the wordage of your invitation will be shown.
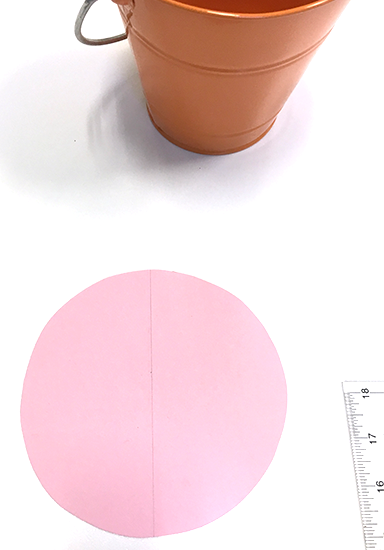
Step 2: Using a ruler, trace a line right down the center of your pink circle. Instead of just guessing a center, measure out how many inches the diameter of your circle is; than mark the middle lightly with a pencil- this is your middle line. Grab your scissors and cut down the line- Voila! Your Ladybug's wings.
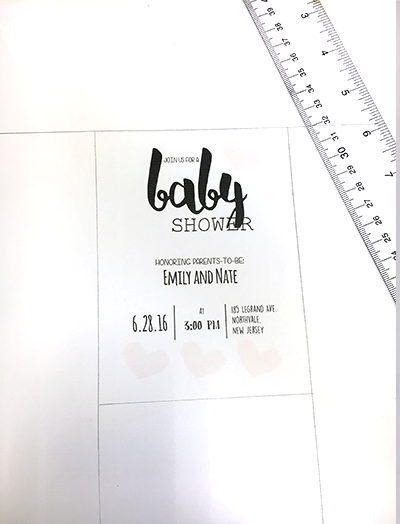
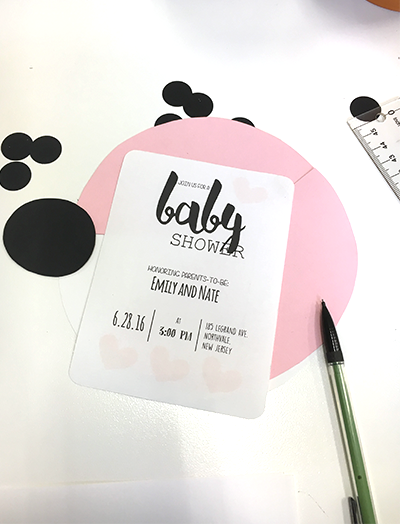
Step 3: With our Clear Translucent Paper, you can design your invite however you’d like! If you're fortunate enough to have that perfect swirly handwriting (which I do not) feel free to write out the invitation on your white circle cut out. Otherwise, Microsoft Word or Photoshop makes designing an invite like this a breeze! Before you start designing, go to Page Layout > Margins > Paper and write in your dimensions. For this paper, I set them to 5 x 3. Place your clear paper into the printer, and once printed cut your paper down to size and make sure it fits into your white circle.
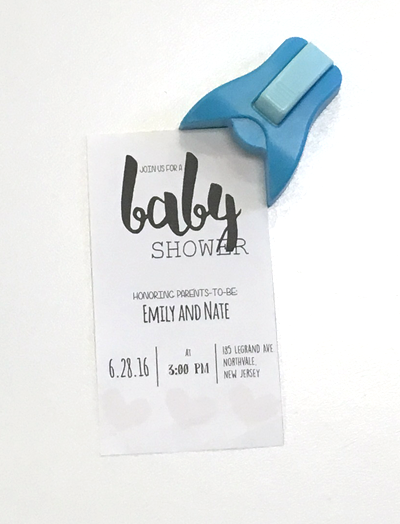
Step 4: Once your clear paper is cut, use the corner punch to give your invitation a smooth and professional appearance.
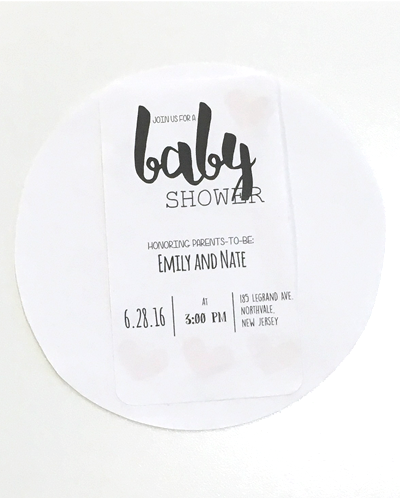
Step 5: Paste the clear paper square invite right in the middle of your white circle (that should be lying around somewhere...)
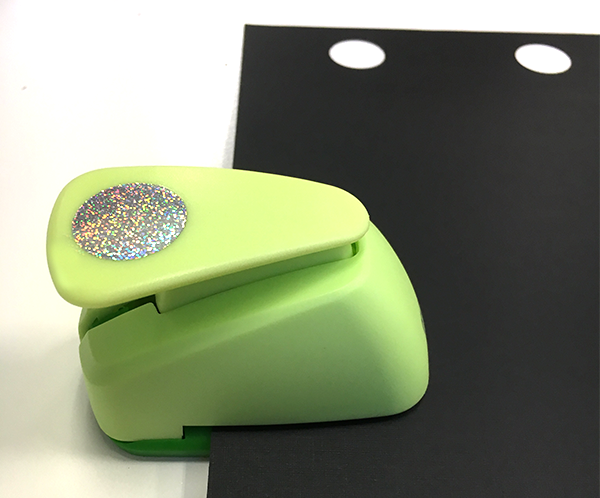
Step 6: Using your hole punch and black paper, punch out 8 circles for your Ladybug’s spots.
Step 7: Using the outline of the bottom of a cup (or anything that’s medium sized and round) & your black paper, trace the outline for your Ladybug’s head. The diameter of my Ladybug’s head is 2 inches, I wouldn’t go bigger than 2 1/2, she might start to look a little top-heavy. Now you have all of your pieces for the baby shower invitations.
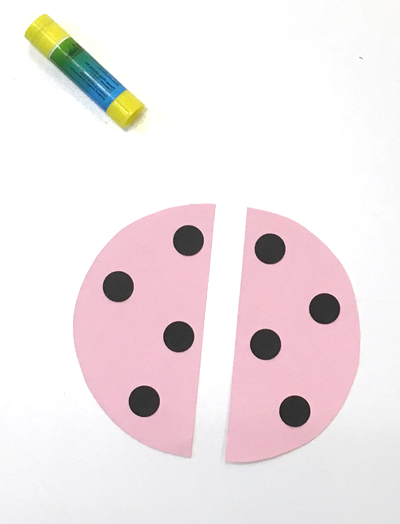
Step 8: Now it's time to glue! Paste down your 8 black spots and attach the bottom half of her head with a little glue.
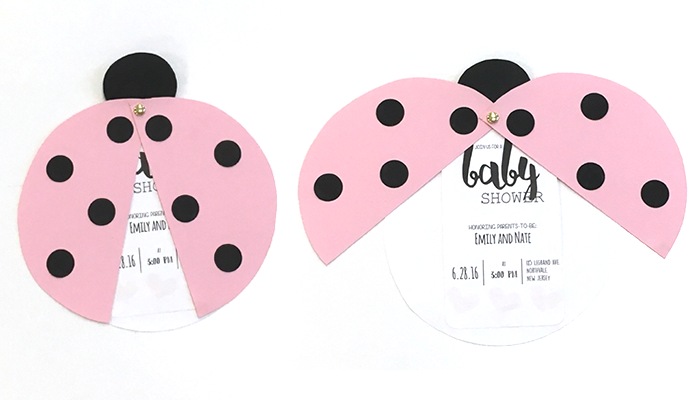
Step 9: Place your wings over the white body (invitation) and using a Brad (that little gold thing) push through the pink wings and white body. Make sure to overlap your wings- one on top of the other, so everything stays put!
And there you have it, a personalized Little Ladybug invitation that's sure to make your friends and family smile!
On to the Next One...
Forecast: Baby Shower!
Requirements:
- 1 pack of JAM Baby Blue and Baby Pink Paper
- 1 pack of JAM White Paper
- 1 pack of JAM Yellow Paper
- 1 pack of JAM Clear Paper
- 1 Corner Puncher
- Scissors
- Pencil
- Glue stick
- Colored Printer
To Break it Down...
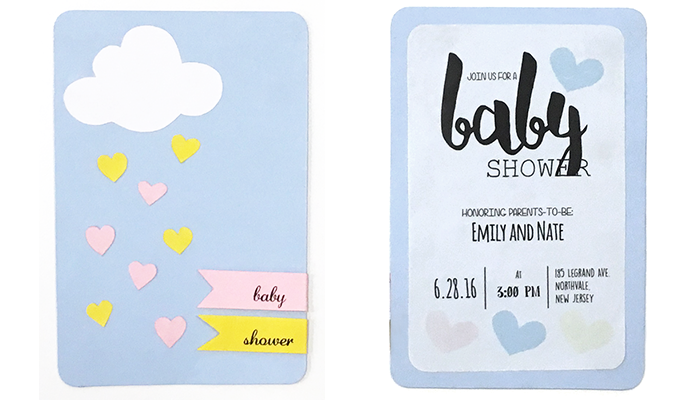
Step 1: First start by cutting your JAM Baby Blue Paper to a mere 6 x 4 inches. This is going to be the base for your baby shower invitation. Grab your corner puncher and trim all four sides of the paper, this is going to give you that professionally bought look- without the professionally bought cost.Step 2: With our Clear Translucent Paper, you can design your invite however you’d like! Make it simple by using Microsoft Word. Go to Page Layout > Margins > Paper and write in your dimensions. If you’re fortunate to have Illustrator and Photoshop, you can easily design there! Just make your dimensions 5 x 3 before you start! Insert the paper in the printer and press print! It’s that simple! Baby shower invitations incoming!
Step 3: The cloud and the hearts: The front of the invitation may look intricate, but it's extremely straightforward. Assuming that you're making more than one invitation you're going to want a base. Draw the outline of your cloud on a thicker piece of paper; that way once it's cut you can trace it onto as many pieces of white paper as you'd like. I traced the outline of my glue stick's cap for the more circular ends of the cloud. For the top and bottom of the cloud draw two humps, it's really quite simple!The hearts are done similarly, I took a thicker piece of construction paper and drew a heart "tracer." Than I traced the shape four times onto yellow paper and four times on pink paper. Cut them out and glue down your heart rain drops how ever you'd like!
Step 4: Almost there! Baby shower invitations are almost ready. Last, you're going to place one sheet of pink paper and one sheet of yellow paper in your printer. In order to achieve the look seen above, type "baby" and "shower" into Microsoft Word using a script font of your choosing! Print one word on a sheet of pink paper and one word on a sheet of yellow paper- cut each word banner 2 inches x 1/2 inch. I than took a ruler to the left corner and traced a triangle shape into the side of the tab. Cut out the shape, glue or tape down your word banners and enjoy! Baby shower invitations for all!And there you have it, two simple and easy to make baby shower invitations!


