Cart
You have no items in your shopping cart.


When it comes to school supplies, textbooks are an essential item that often lacks a personal touch. Those same patterned fabric book covers you buy year after year, ugh! And worse of all, you're spending $7 for each book cover, again and again, year after year. Feels a bit dull and lacking style. However, with this DIY project, we’re going to replace those ordinary book covers with eye-catching masterpieces!
In this step-by-step photo guide, you’ll be able to follow along to create an inexpensive and simple book cover just in time for Back to School. All you need is wrapping paper and some office supplies which you probably already have at home. Best part about this project, you will be able to get multiple books covered from just one roll of wrapping paper!
We’re giving our DIY Book Covers a 90s vibe. Why? Because everything 90s style rules! Why wouldn’t it? Retro patterns, vibrant colors, bold lettering….enough said! So, gather your materials, let your imagination run wild, and embark on the journey of revamping your textbooks with our step-by-step guide for DIY Kraft Wrapping Paper Book Covers: “90s” Style!

Supplies Needed
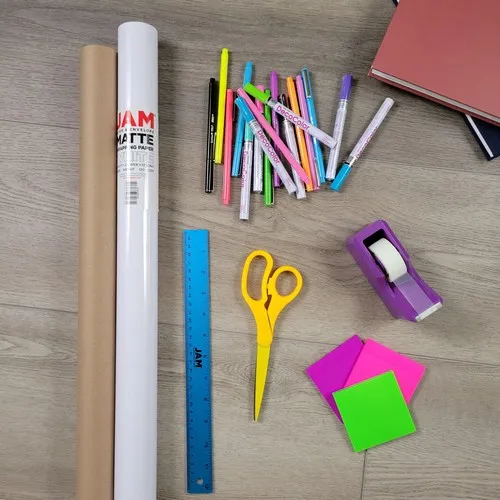
Kraft wrapping paper
Scissors
Tape
Pens & Markers (Le Pens & Acrylic Markers used in this Step-By-Step guide linked below)
Decorative Elements optional (stickers, glitter, sticky notes etc.)
All JAM BNC items used in this Step-By-Step guide are linked at the bottom.
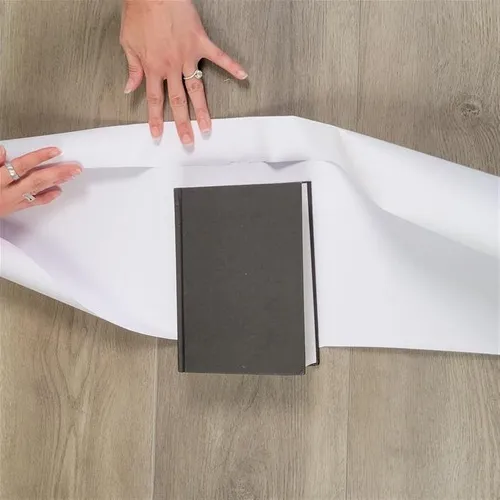
1. CUT WRAPPING PAPER

Lay your textbook closed, centered on top of the kraft wrapping paper, with about 1-inch slack on top and bottom of your book. Cut straight across wrapping paper.
2. CREATE TWO CREASES
Fold about 1-Inch up from the top of the wrap to create a nice crisp, folded crease. Doesn’t have to be perfect, trust your eye it will work out. Repeat on bottom.
Place your textbook centered on top of your creases. If your books top & bottom edge are in line with your folds, you are good to go. If not adjust one of the folds a bit to match your books height.
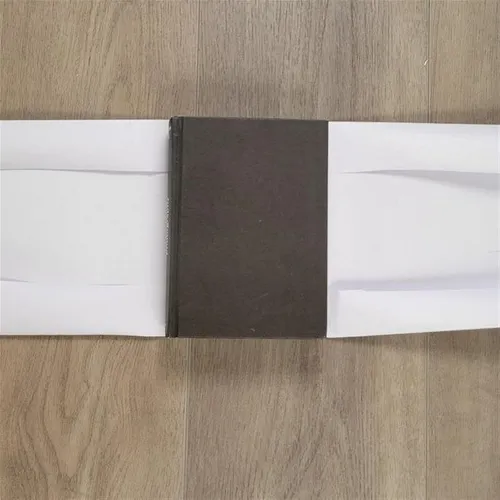
3. FOLD THE EDGES
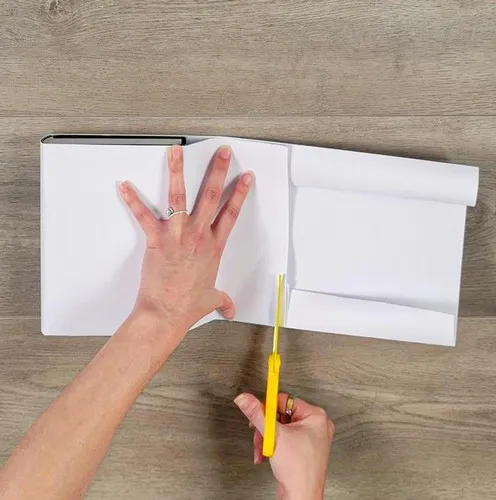
Lie your book on top of both folded edges and pull your wrapping paper over the front cover of the book to completely cover it. Have a good amount of paper slack on both ends, cut ends evenly and discard the rest.
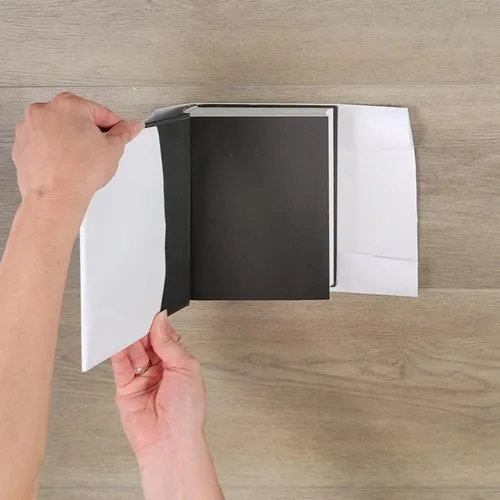
Fold the paper over the front cover, close, and crease nicely. Repeat on the bottom side.
4. SECURE
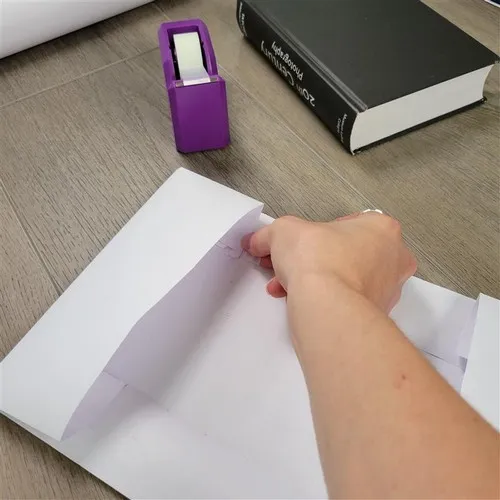
Move the textbook to the side and secure all four sides of the cover to the wrap. Use a small piece of tape to adhere the inside corner down to the paper. Repeat to all corners.
5. CUSTOMIZE

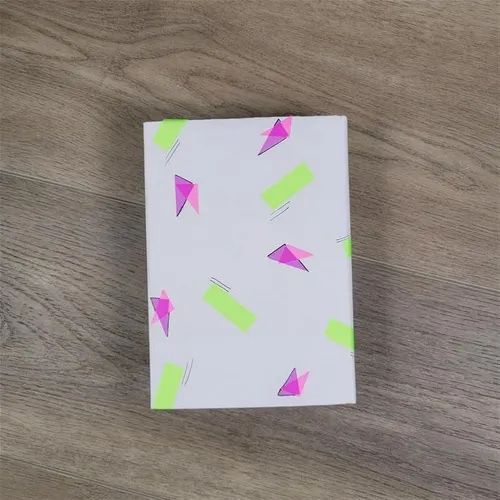
Personalize your book covers! We went with a 90s aesthetic using vibrant patterns, bold colors, and popular symbols. Adding a 90s vibe to your DIY book covers will not only ooze nostalgia but also give them a trendy look that holds a special place in our hearts!
Side Note: You could do Step 6 before 5 if you want to get the cover on your textbook first before decorating. We choose to decorate first because we didn’t want to take any chances with marking or damaging our textbooks.
6. FINISH
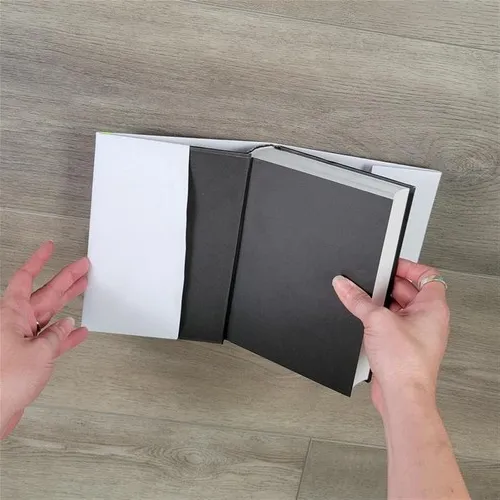
Slid the front cover of your textbook into the left side pocket, close. And now, the slightly tricky part, sliding the back cover into the right-side pocket. You got this!
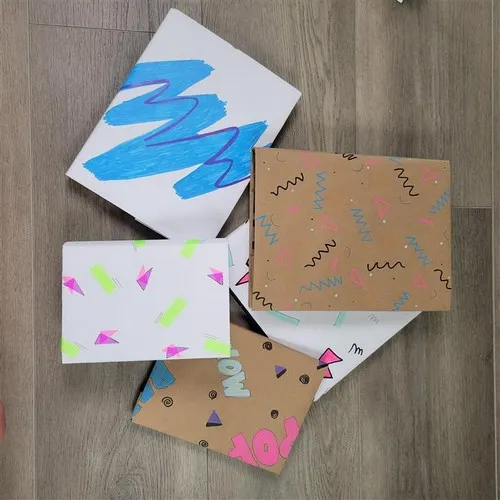
Once you've done one, why not cover them all!
Repeat the 6 steps above to the remaining of your textbooks. And the best part, in a month or two, when you’re feeling an urge for something new, simply rip off and create another one with this easy-to-follow Step by Step guide!
Let your creativity soar with this simple DIY Book Cover project. Get ready to make a statement with your one-of-a-kind 90s Style Back to School book covers! Happy crafting and happy studying!
All JAM BNC items used in this Step-By-Step guide linked below:
Tape Dispenser
(Not needed for project, just tape, but we do have awesome colors of these at JAMBNC and we’re obsessed!)
Head to our Instagram page and click on our Reels to check out the making of these 90s Style DIY Book Covers!

In today's fast-paced world, personalizing and protecting textbooks is essential for students of all ages. This article introduces the idea of using wrapping paper as a creative and cost-effective solution for DIY book covers. By following the step-by-step instructions and creative ideas provided, readers can easily transform their textbooks into personalized works of art. From choosing the right materials to adding unique embellishments, this article will guide readers through the process of creating professional-looking DIY book covers for back-to-school season.
DIY book covers offer a range of benefits for students, teachers, and book lovers alike. Personalization is a key advantage, as individuals can showcase their unique style and personality through custom book covers. Additionally, DIY covers provide an extra layer of protection for textbooks, preventing damage from everyday wear and tear. Cost savings is another benefit, as creating your own book covers using wrapping paper is much more affordable than purchasing pre-made covers. Furthermore, DIY book covers allow for creativity and self-expression, making the process of covering textbooks a fun and enjoyable activity.
Creating DIY book covers using wrapping paper requires a few essential materials. First and foremost, you will need wrapping paper in your desired pattern or color. Scissors are necessary for cutting the paper to the correct size, while tape is used to secure the paper to the book. Embellishments such as stickers, ribbons, or labels can be added for a personalized touch. Having these materials on hand will ensure that you can easily transform your textbooks into unique and eye-catching creations.
When creating DIY book covers using wrapping paper, it is important to follow a few simple steps to achieve a professional-looking result. Begin by measuring the dimensions of your textbook and cutting the wrapping paper to size, leaving a few extra inches on each side for wrapping. Next, carefully wrap the paper around the book, ensuring a snug and secure fit. Use tape to secure the paper in place, smoothing out any wrinkles or air bubbles. Finally, add any embellishments or decorations to personalize your book cover further.
There are endless possibilities when it comes to creative ideas and designs for DIY book covers using wrapping paper. Experiment with different patterns, colors, and textures to create a unique look for each of your textbooks. Consider adding embellishments such as stickers, washi tape, or cut-out designs to make your book covers stand out. Mixing and matching wrapping paper with other materials can also result in eye-catching and original designs. Don't be afraid to get creative and think outside the box when designing your DIY book covers.
DIY book covers using wrapping paper are ideal for:
Consider making DIY book covers using wrapping paper:
Real-world examples of using DIY book covers with wrapping paper include:
Our DIY book cover ideas using wrapping paper stand out from the rest due to their simplicity and creativity. By offering step-by-step instructions and creative designs, we make it easy for readers to transform their textbooks into personalized works of art. The use of wrapping paper as a cost-effective solution adds a unique touch to the process, making it accessible to everyone. Additionally, our tips and tricks ensure that the final result is professional-looking and durable, providing long-lasting protection for textbooks.
One of the key features that make our product special is the ability to customize book covers to suit individual preferences. By adding name labels, stickers, and drawings, readers can truly make their textbooks their own. Personalizing covers with unique designs and embellishments allows for self-expression and creativity, making the process of covering textbooks a fun and engaging activity.
To get the most out of our DIY book cover ideas using wrapping paper, consider the following tips:
For those looking to take their DIY book covers to the next level, consider creating a theme for all your textbooks. Whether it's a specific color scheme, pattern, or design element, having a cohesive look across all your book covers can add a touch of sophistication and style to your collection.
Transforming textbooks with DIY book covers using wrapping paper is a creative and cost-effective way to personalize and protect your books. By following the step-by-step instructions, exploring creative ideas and designs, and learning tips and tricks, readers can easily create professional-looking book covers for back-to-school season. Whether you're a student, teacher, or book lover, DIY book covers offer a fun and enjoyable way to showcase your unique style and personality. Get creative and start wrapping your textbooks today!